What you need:
Material scraps-you'll use less than a fat quarter of fabric.
Buttons for eyes [or preferred alternative. I used snaps in this tutorial]
Sewing machine
Needle and cotton
Pattern pieces:
You can download the body pieces here and the wing pieces here. Make sure when you print that you have it set to 100% not scale to fit. Measure the 1 inch square to check it has correctly printed.
You need to cut the following:
Butterfly Body [cut 2]
Butterfly Upper Wings [cut 4]
Butterfly Lower Wings [cut 4]
Caterpillar Body [cut 2]
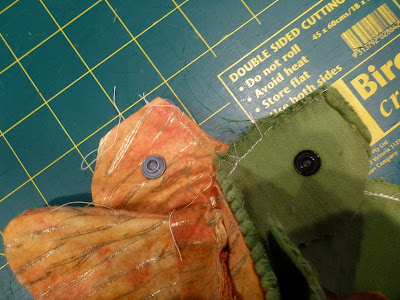
Cut two body pieces for the caterpillar and butterfly. Add eyes and any other embellishments you want now.
Repeat with the rest of the wings and turn right way out. Once you have all four turned out, match into pairs of one upper and one lower. Position with the upper overlapping the lower and stitch to hold together.
Place on butterfly body and mark the points where the wing will sit with an erasable marker.
Cut between the dots and repeat with the other wings and body.
Push wings through the cut made and fold body together so you have the wings sandwiched between with the wing raw edges protruding through the cut. Stitch across, making sure you catch all the layers. Go about 1/4 inch either side of the cut, tapering to the fold [like a dart]. Repeat with other wings and body.
You now should have two butterfly bodies with wings attached. I like to topstitch under the wing on the body as it helps lift the wings a little higher.
With right sides together pin a caterpillar body to the butterfly body. You want the pins at least 2 1/2 to 3 inches apart. This will become the opening that you turn the finished toy through to change from butterfly to caterpillar, so you don't want it to be too small.
Stitch between the pins, making sure you reverse stitch both ends to they hold nicely. [Ignore the two lines of stitching on the left piece...I didnt catch the butterfly body properly the first time.]
Now it gets a little tricky. You now need to line up the heads of the caterpillar and butterfly with it's corresponding head on the second piece right sides together. Pin the seam join to hold it still and stitch across-it's not a straight seam, more of a 90 degree seam so you will need to re-adjust your fabric [needle down in fabric!] when you get to the middle seam. Also make sure that you meet the seam from the step before or you will end up with a hole where the heads join.
This is what it should look like from the inside.
And the outside. If you have missed meeting the seam from the previous step a hole will be evident right where all four pieces meet. If this does occur, just resew the last seam closer.
Repeat with the other end. Now the whole bottom [middle] seam should be completed and look something like this.
Sew along the rest of the caterpillar body and clip the dips in the bumps.
Stuff the butterfly wings into the caterpillar body and sew around the butterfly body, leaving a turning hole in the centre of the back.
Turn right side out. You should now have a caterpillar and butterfly joined along the bottom [middle] seam.
And there should be a hole in the back of the butterfly.
Ladder stitch the opening closed.
And you are done!
Caterpillar
Turning into...
A butterfly!
This pattern should work with most fabrics. Because the fabrics I used here have little to no stretch [cord and flannelette], it is fairly fiddly to turn them from one to another-in particular from butterfly to caterpillar. I would think using stretchier fabric would make it a lot easier to turn from one to another.


No comments:
Post a Comment