Sunday, 21 April 2013

Kids Clothing Week

This is the first time I've signed up to participate in KCW. I'm hoping even with work and looking after Ember, I'll get a chance to do some more sewing for her. Might have to drag out the playpen and surround my sewing desk from little fingers!


I found out about Kids Clothes Week by trawling a few sewing blogs, I'm not sure whose blog I originally found it on though. Basically the idea is you sew for at least one hour a day, for kids...either your own or someone elses'.

I'll be sewing for my 17 month old daughter, as she is in need of some new warmer clothes as winter is fast approaching here. We had the first all day rainy day today, in which we mainly stayed snuggled in bed reading books and playing games.

On my list of things to make/do this week are:
-Elegance and Elephants's Bubble Shorts and Ruffle Top
-Puperita's Red Riding Hood Jacket
-Overalls-I have yet to find a pattern I like, so I am hoping to trace off a pattern from some overalls she already has which belonged to her dad as a child!
-Finish off the jacket I have already made, just need to add the toggles!
-And if I have time finish off some dresses I have cut out which I plan to donate to Dress a Girl Around the World

So somehow I plan to achieve all this during the week! Crazy? Most likely...

Sunday, 7 April 2013

E&E Ruffled Tunic Top

Recently I purchased Elegance & Elephants's Ruffled Tunic Top pattern. I loved the simplicity of the design, the three style options and the potential for customization-as I can never follow a pattern properly!

It recommended light fabrics, but as we are heading into winter I decided to try it with something a little heavier. The first I made out of a medium weight duckcloth and chose the A-line dress version. Whilst all three options are adorable, this one I thought would be most practical for Ember.

I made a size 3, so it will last longer! It also makes it longer in length on her, so it will be warmer through the winter months.


It is such a versatile little dress! Ember wore it when we went to Kangaroo Island. Please excuse how crumpled it looks! We had a big day that day, going to a honey farm, eucalyptus oil farm, lavender farm and then meeting the wallabies where we stayed.


The second A-line I made I decided to line for warmth. The outer shell is quilting cotton and the lining flannelette. I think I over complicated how I lined it but I'm sure next time will be easier!


Hopefully I'll be able to get some photos of Ember in this one over the coming days!

Tuesday, 12 February 2013

Ember's Quilt

After Ember was born, I wanted to make a quilt. Something for her to treasure and cherish as she grows up. Now I'd never ventured into the realm of quilting before, so I did it like I do with any other sewing...throw myself blindly into it and NOT follow the pattern I chose.

I started it when she was 11 weeks old and finished it one day shy of eight weeks later [Ember was 19 weeks]. I am still gobsmacked at how quickly I managed to finish it, especially being my first ever quilt.


There are 816 squares, done in 48 blocks [not including the neutral sashing between the blocks].


I have some wonderful memories of sewing the blocks with her in the baby carrier and hand binding the edging with her nestled in the quilt asleep. I miss those days sometimes...

Now at 14 months everything is just busy busy and on the go! Only time she rests is when she is napping.


It is no where near perfect. I wasn't particularly careful cutting the squares out, nor with my fabric selection...some of the fabrics are much thicker and less stretchy than quilting cotton. My straight line quilting is not very straight, and there are plenty of puckers thanks to uneven blocks because I didn't bother squaring them up. But you know what? It doesn't matter.

Because Ember loves it!

Monday, 14 January 2013

Little Vintage Frock

I love vintage children's patterns, there are so many cute little frocks and rompers. I was lucky enough to be sent a copy of another vintage children's pattern. This time a little frock.


Absolutely adorable in my eyes!!

Which means that I had to try it right away. Well, when I mean right away, I mean once Miss Ember has gone to sleep and I haven't fallen asleep putting her to bed.

When trying out a new pattern for the first time, I like to make a mockup out of not so good fabric just in case I stuff something up. That's where my big crate of solid colour cottons come in handy, it contains almost every colour imaginable...except red! I discovered that when I was looking for a red piece to contrast a pretty cream and red fabric. Anyway, back on subject...

Ack! So adorable!

The mockup frock turned quite well, but I didn't really like how the garment was constructed, other than the french seamed side seams. I love french seams!! I like not having seams or raw edges showing if possible. So my plan for future frocks is to not follow the pattern [which is very typical of me] and line the bodice instead of doing the facings. Maybe even make some reversible frocks by doubling the skirt too...

I now have four more frocks cut out...just need to sneak away from the small child [hah!] and sew them.

Sunday, 6 January 2013

Vintage Hearts Romper Tutorial


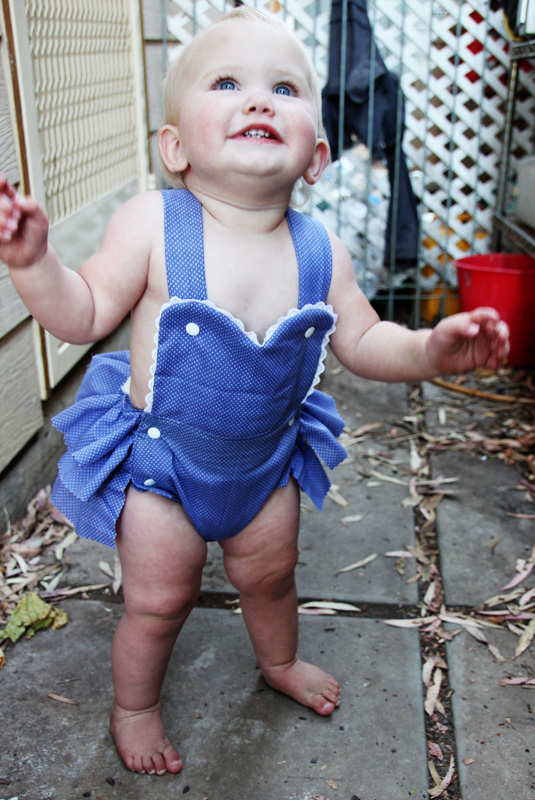
Here is a tutorial for the Vintage Hearts Romper.

For the pattern pieces, please follow this link: Vintage Heart Romper Pattern Pieces. You will need to make sure your printer is set at 100% or Actual Size, don't 'shrink to fit' or it will be too small.

Size: 1-2 years

Pieces:

Main Fabric
1 x Front Pants Piece
1 x Back Pants Piece with ruffle placement marks
2 x Bib Piece [I added about 1 ½ inches to the length of the bib to suit my daughter.]
2 x Straps 3” x 18”
1 x Ruffles 3.5” x 44” [for full ruffles] or 34” for looser ruffles

Contrast/Lining Fabric
1 x Front Pants Piece
1 x Back Pants Piece
2 x Ruffles 3.5” x 44” [for full ruffles] or 34” for looser ruffles
1 x Bib Ruffle 2” x 31”

Interfacing
2x Front Pants Facing
2x Back Pants Facing

Lace [optional]
6mm Elastic [1 x 8”, 2 x 9-10”]
Plastic Snaps or desired fastenings
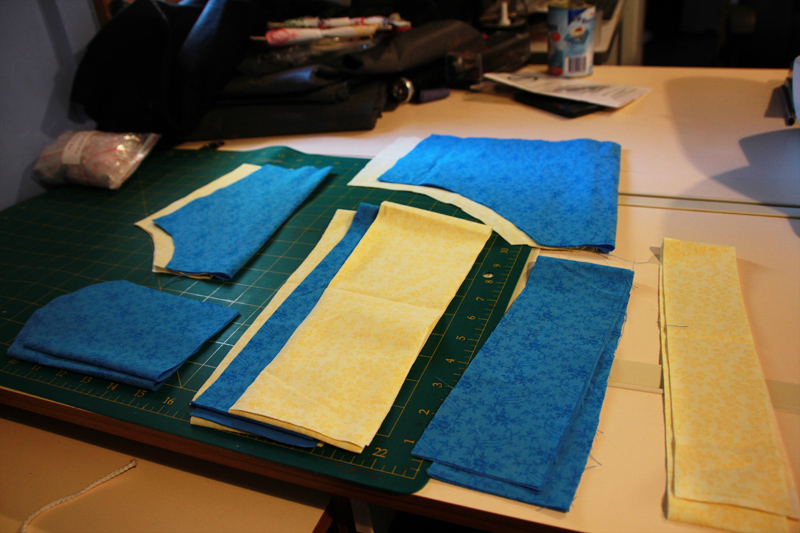
Cutting
Cut all your pieces out. You can get all the pieces cut out from 1m [½ of main, ½ of contrast/lining] with a little bit of fiddling and folding.


Straps
Fold in half, stitch across one end and up the length. Turn and press. Top stitch [optional].


Ruffles
Either hem, pinking shear or sew lace to the bottom edge of the ruffles.
Run gathering threads along ruffle and gather to desired fullness. 44” makes a very tight full ruffle, 34” is a loose light ruffle.


Bib Ruffle [Optional]
Fold in half so long ends are together and run gathering stitches along raw edge.

Note: I gather my ruffles on my sewing machine by setting my stitch length to 5 and my tension to 9.

Bib

Pin lace or bib ruffle inwards to one of the front bib pieces and stitch.

Right sides together, stitch the two bib pieces together leaving the bottom open.

Clip and notch, turn out and press. Top stitch [optional].
With Lace

With Bib Ruffle


Interfacing
Iron interfacing facings to wrong side of material of back pants and front pants.


Pants
Attach lowest ruffle to back pants piece. Pin it to the ruffle placement marks upside down [right sides together] and stitch.

Flip ruffle down into position and top stitch. Remove gathering threads. Repeat with middle ruffle.


Sew crotches of front and back pants outer pieces together. 

Sew crotches of lining pieces together, leaving a 1.5-2” turning hole in the centre.

Pin bib and lining to front waist, right sides together.

Pin top ruffle, straps, and lining to the back waist. Ruffle should be attached to where the interfacing pieces end not the length of the waist band.
Showing the order to pin before pinning the lining over the top.

Showing the order to pin, back pants, top ruffle, straps and then the lining.


Stitch all around the pants pieces, right sides together using a min 1/4” seam.

Attach back elastic [8”] on the seam allowance. It shouldn't overlap the interfaced parts of the fabric.

Attach leg elastic on the seam allowance. Again it shouldn't overlap the interfaced parts of the fabric.

Sew around all edges, attach elastic to seam allowance and then turn out through hole left in the crotch.
Clip corners and curves. Turn right way out.

Pin and stitch back elastic casing through all layers including top ruffle-except the straps , being careful not to catch the elastic in the seam.

Pin and stitch leg elastic casings, being careful not to catch the elastic in the seam.

Attach snaps to bib and straps, the back and front facings [2-3 sets per side].

Optional: tie a knot or attach a snap on the crossover of the straps to help hold them steady.

And you are done!


Vintage Hearts Romper

This adorable little vintage pattern came to me, thanks the the generosity of a lady on one of my facebook sewing groups! 

It was just the pattern pieces, no instructions, so I decided to bite the bullet and just wing it! 


The blue was by far the fiddliest! So for the next one I modified it to have a lining. It made it so much easier to sew together and saved a lot of time and finger stabbing with pins! I also prefer the look of no exposed raw seams.


The second I made out of some vintage fabric I had in my stash, and if I do say so myself, it worked really nicely!


Because the pattern was so kindly shared with me, I will be posting a tutorial shortly, so others can make it too. :)